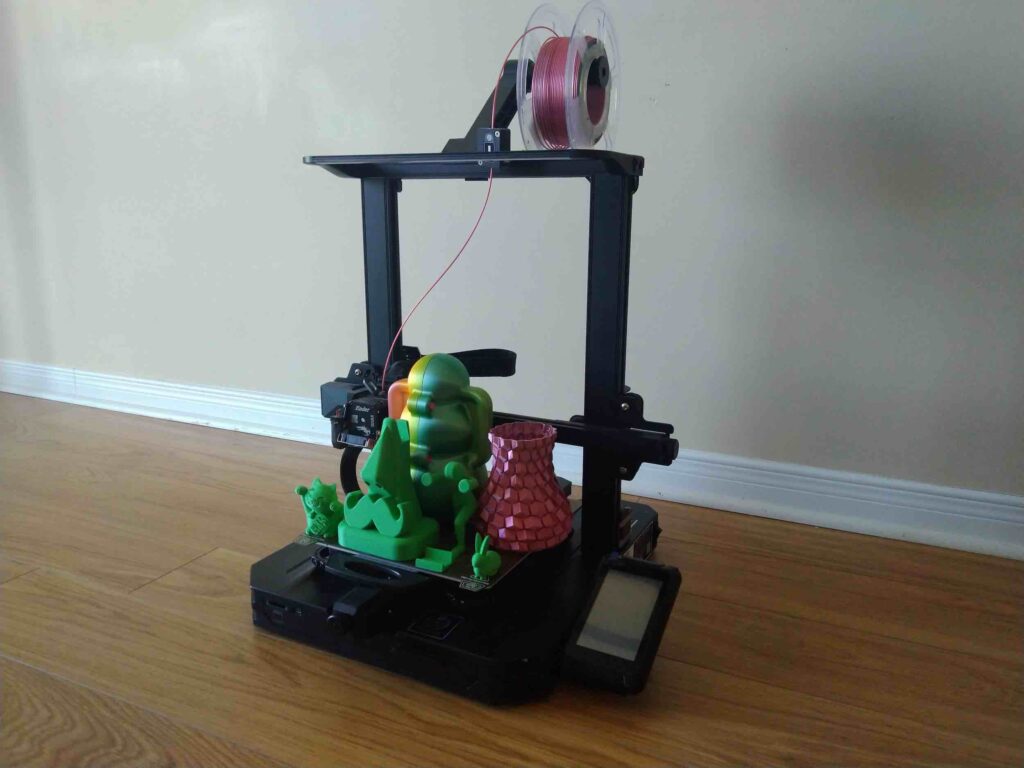
The Manufactur3D team recently put Creality’s promising new printer, the Ender-3 S1 Pro, to the test. Creality is a Chinese manufacturer of FDM 3D printers known for producing some of the most affordable and dependable 3D printers for the maker community. Its printers are primarily aimed at beginners, enthusiasts, and hobbyists, but they are also versatile enough to be used for prototyping by engineers.
In this review, we will go over the various features that impressed us as well as some issues we encountered while using it. We’ll give you our honest opinion on this printer and answer one important question: Should you buy the Ender-3 S1 Pro printer?
About Creality Ender-3 S1 Pro

Let’s start with the Creality Ender-3 S1 Pro specifications before moving on to the unboxing, testing, and review.
The Ender series is Creality’s low-cost 3D printer series that is both capable and reliable. Unlike some brands that sacrifice reliability to reduce costs, the Ender series is known to deliver on its promises and the printer really lasts long without much maintenance issues.
The Ender-3 S1 Pro is an upgraded version of the Ender-3 S1 and now sits in the middle of the Ender-3 S1 series’ hierarchy, with the previous generation being the S1 and the next generation being the S1 Plus.
The S1 Pro is a mid-sized FDM 3D printer having the same build volume as the S1, which is 220 x 220 x 270 mm, but some additional features distinguish it from the previous version. The S1 Pro has a slightly higher bed temperature (110°C) as well as a noticeably higher nozzle temperature (up from 260°C to 300 °C). This means it can print with more materials, such as PLA, ABS, TPU, PETG, PA, Nylon, and Carbon fibre.
A PEI spring steel magnetic build plate, CR-FDM-v2.4.S1 v301 mainboard, a 4.3 inch LCD touchscreen display, and their new Sprite Direct Extruder are also included (also seen in S1). All these components work seamlessly to print out parts that are fairly smooth without any major first layer or bed adhesion issues.
Tech Specifications
| Machine Footprint | 490 x 455 x 625 mm |
| Technology | FFF FDM |
| Weight | 8.6 Kg |
| Build Volume | 220 x 220 x 270 mm |
| Layer thickness | 100 – 400 Microns |
| Bed Temperature | 110 °C |
| Nozzle Temperature | 300 °C |
| Nozzle | 0.4 mm |
| Material Compatibility | PLA, ABS, PETG, TPU, PVA, Carbon Fiber, Nylon, ASA |
| Extruder Type | Direct Extrusion |
| Filament Runout Sensor | Yes |
| Bed Levelling | 16-point CR Touch for Automatic levelling |
| Connectivity | Micro SD, Micro USB |
| Interface | 4.3 inch LCD touchscreen |
| Slicer | Creality Slicer |
| Camera | No |
What’s in the Box?

Creality is known for packing printers snugly, and the Ender-3 S1 Pro is no exception. It is packaged in a decently sized tight box with neat black foam cut-outs to support its contents. There are several packets in the box.
The printer itself is semi-assembled, which simplifies the assembly process. The printer is divided into two parts: the build plate and the gantry.
Other components include a power supply cord, a 4.3 inch LCD touchscreen display, a direct drive extruder and hot-end assembly, a filament spool holder connected to a filament detector, and a tool kit that includes a scrapper, Allen keys, a cutter, a screwdriver, and spanners.
A pen drive and an SD card are also included in the box for transferring files to the printer. The pen drive contains a number of gcode files that are ready to print on the printer. You can immediately begin printing the model after connecting it to the printer.
Finally, it comes with a detailed quick installation guide that will walk you through the process of assembling the printer.
All of the components appear to be of high quality, making you want to touch and feel them. The user manual is also very useful, especially for beginners who are putting together their first printer.
Printer Assembly


The printer is delivered semi-assembled, with two major parts – the build plate and the printer frame – that must be joined together. This means you only need to put together rest of the parts before you can begin printing. The printer frame is delivered as a complete unit, with the extruder already attached to the horizontal guiderail. If you are a beginner, check out the installation guide which contains detailed instructions that you can follow.
For experienced users, the assembly will be a cake-walk. The rest of the assembly includes putting together electrical connections, clipping the screen, attaching and adjusting the print bed, check and make sure the extruder assembly is nice and tight and moving around fine, and finally attaching the spool holder.
After reviewing several printers, the Manufactur3D team was able to assemble the printer in under half an hour and with relative ease. This may take an additional 15-20 minutes for complete beginners.
Design of Ender-3 S1 Pro
The Ender-3 S1 Pro’s design is very similar to the previous generation. The printer’s aluminium body and frame, the extruder and the print bed feels quite premium. The printer has a sleek appearance with its black and silver colour scheme, which is similar to all Ender printers. Creality, and more specifically the Ender series, is not known for its design innovations and so there is nothing much to talk here about the design changes. Also, given the price at which the Ender printers are being made available, it will be too much to expect an innovative design. So, the design neither disappoints you nor does it excite you.
The Ender-3 S1 Pro has a Cartesian-XZ-head mechanical arrangement while the bed moves in the Y-direction. It has an aluminium frame which makes it stable and durable. The printer is small and takes up little space, making it ideal for small workshops or home use.
The touchscreen has a slanting attachment that allows you to use and view it while standing.
Features
Build Volume
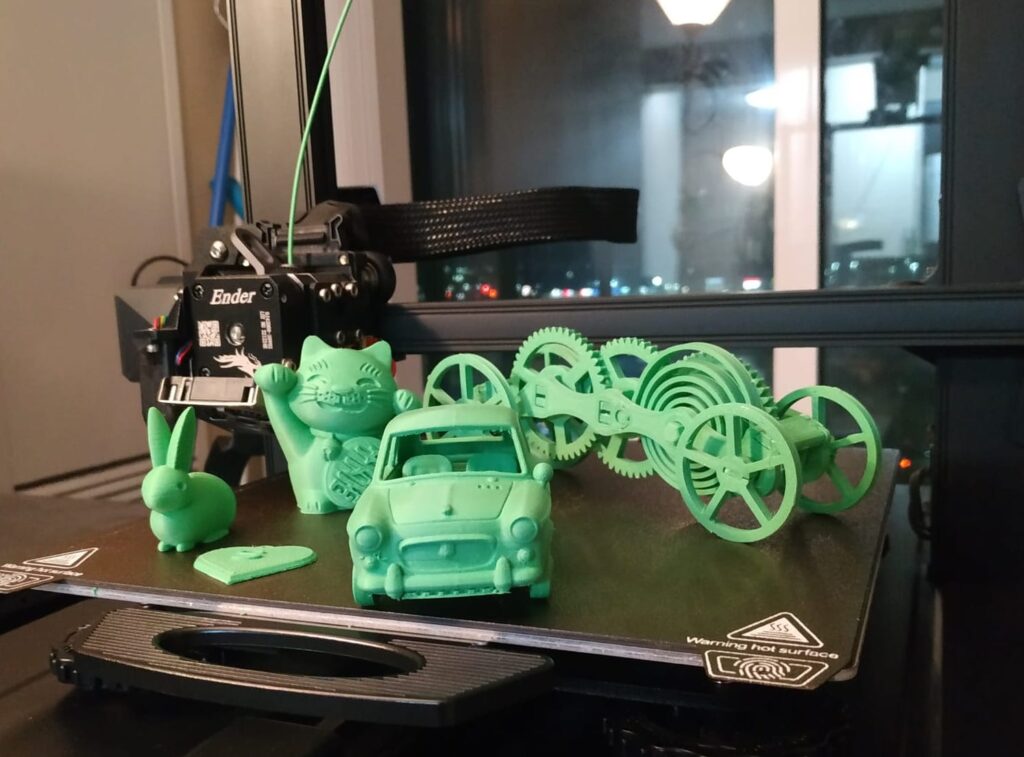
The Ender-3 S1 Pro has a build volume of 220 x 220 x 270 mm, which is decent enough for a printer in this price range. This size is ideal for printing small to medium-sized objects, and you can even print larger objects by breaking them down into smaller pieces and assembling them later.
Print Bed
The Ender-3 S1 Pro features a spring steel PEI-coated magnetic build plate which functions excellently and has good adhesion and allows for easy print removal. It is a flexible plate that can be twisted or bent for easy part removal, eliminating the need for sharp scrapers.
The bed can reach temperatures of up to 110 °C, making it ideal for printing with materials like ABS, Nylon and Carbon Fibre.
Extrusion System
The Ender-3 S1 Pro has a direct extrusion system, which means you can print with a wider variety of materials. Direct extrusion systems are also simple to load, provide faster response, and make it simple to load and unload filament.
Print Head
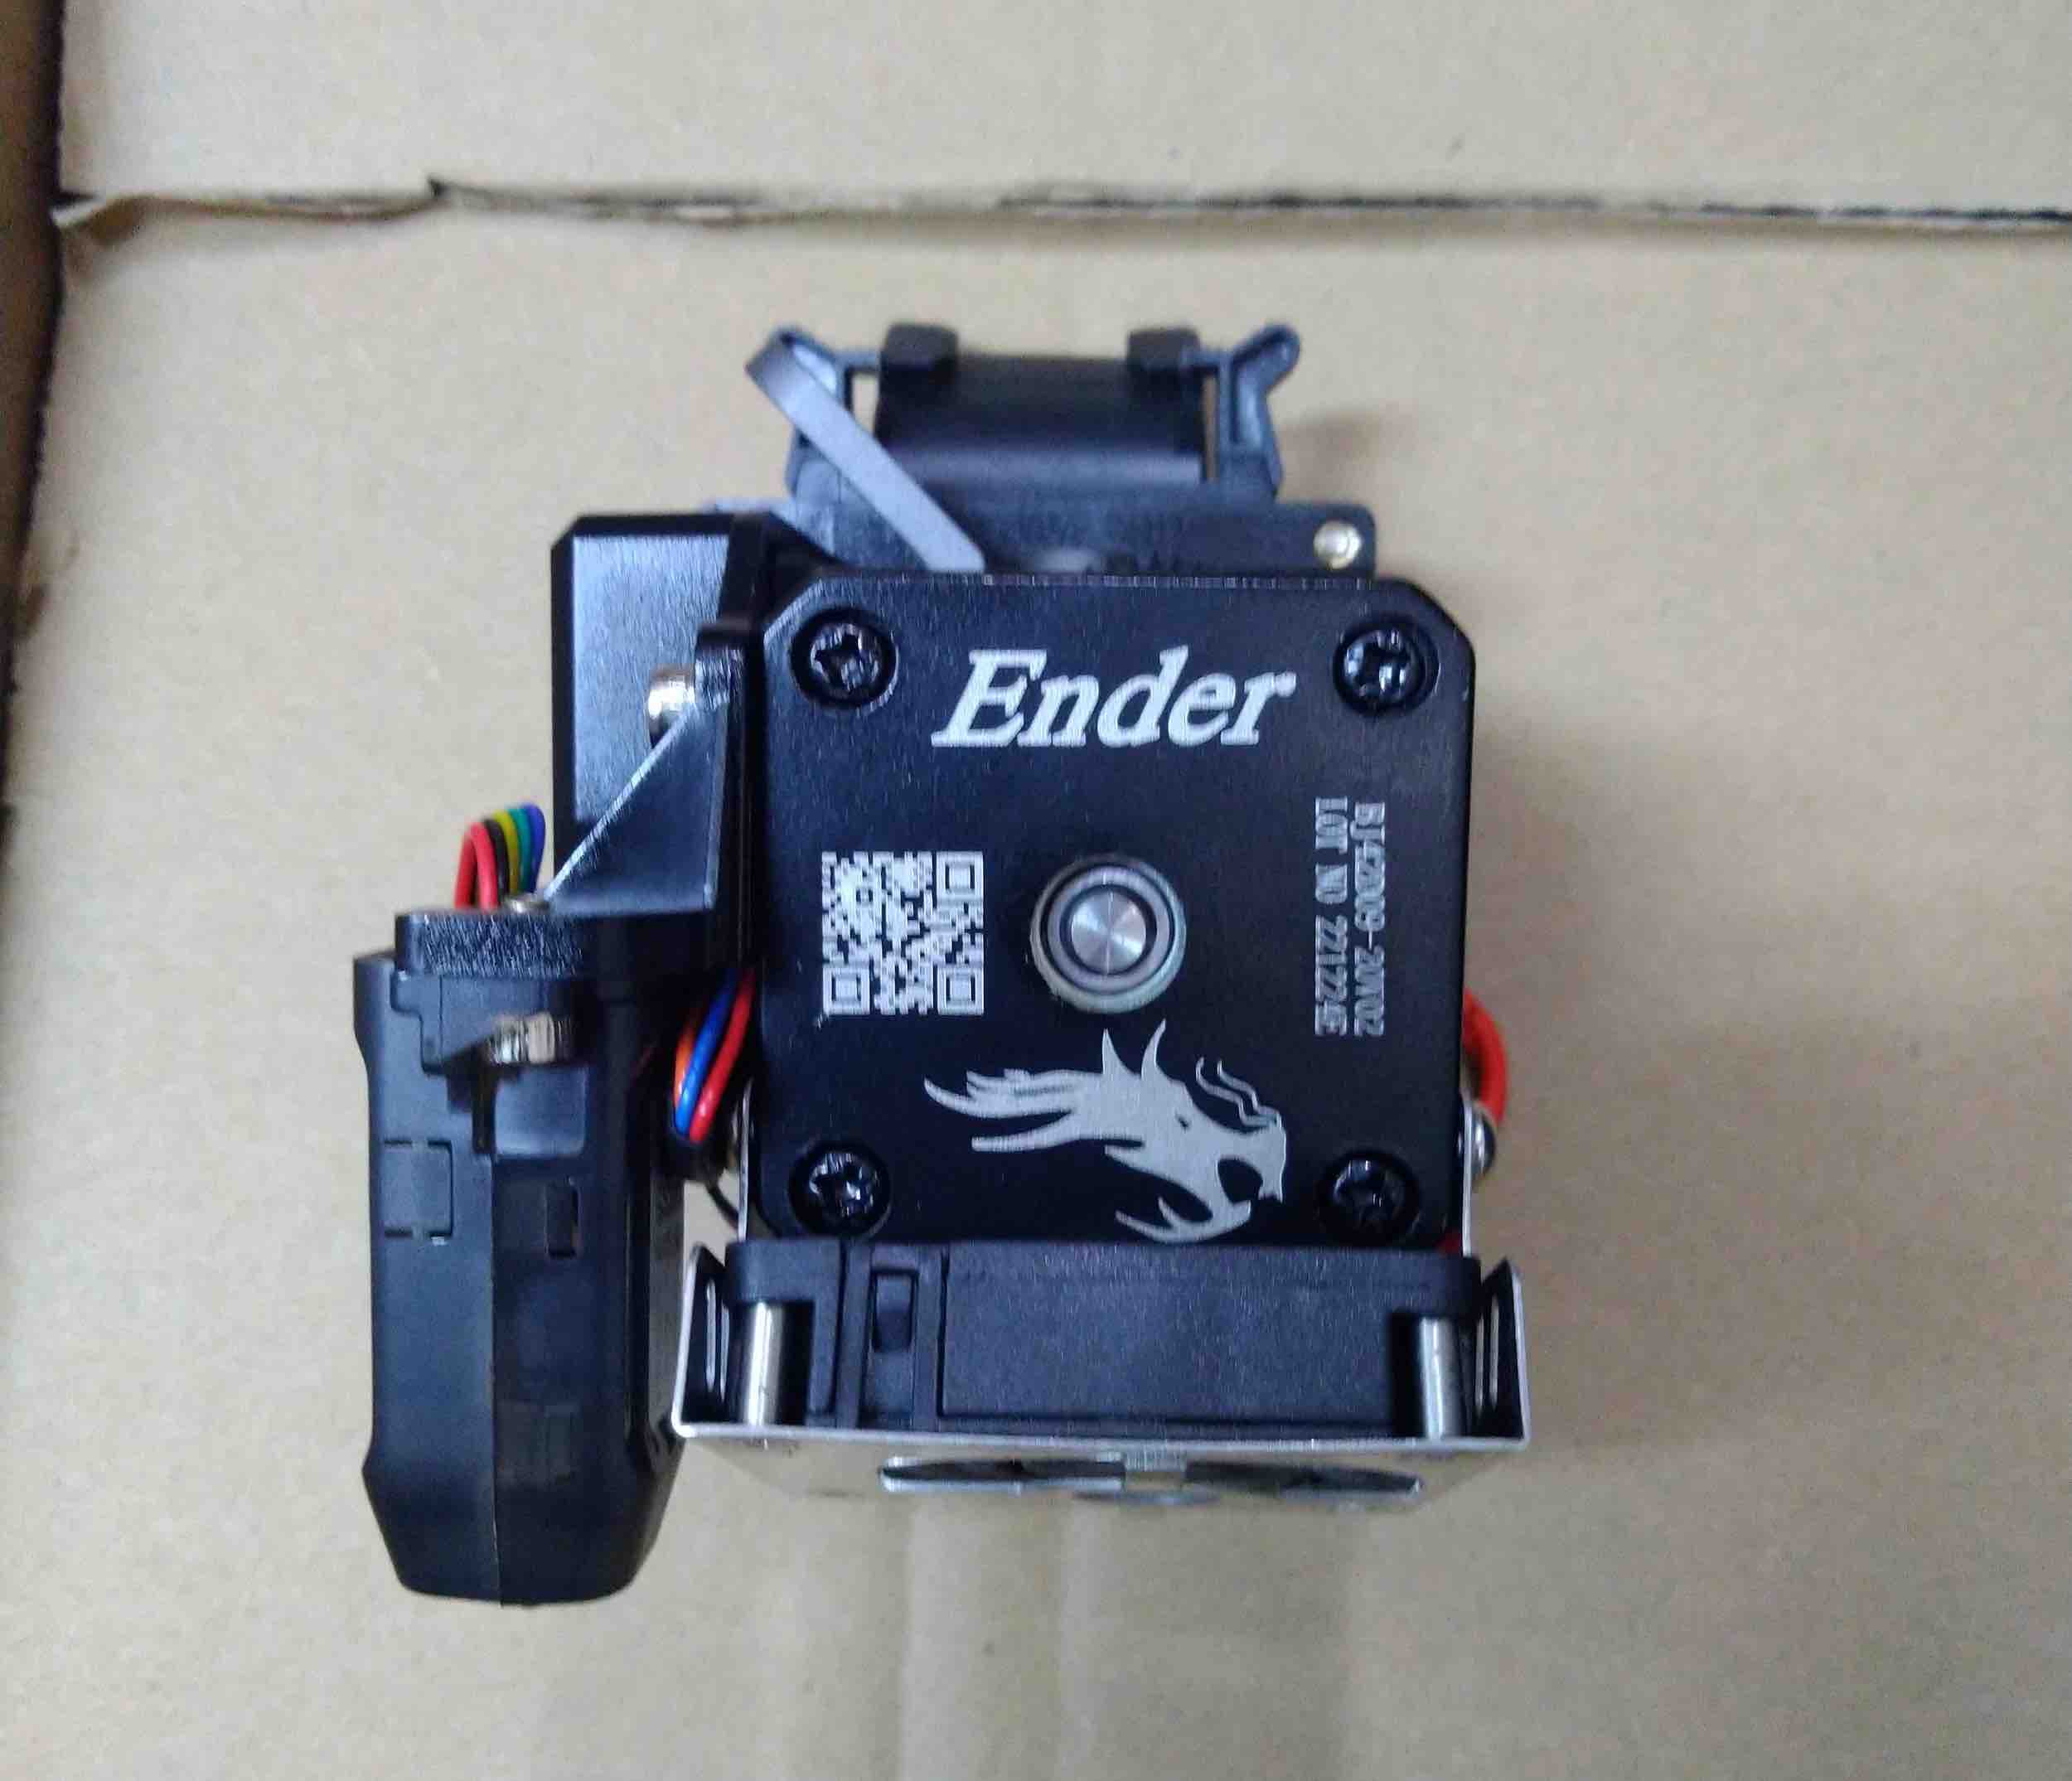
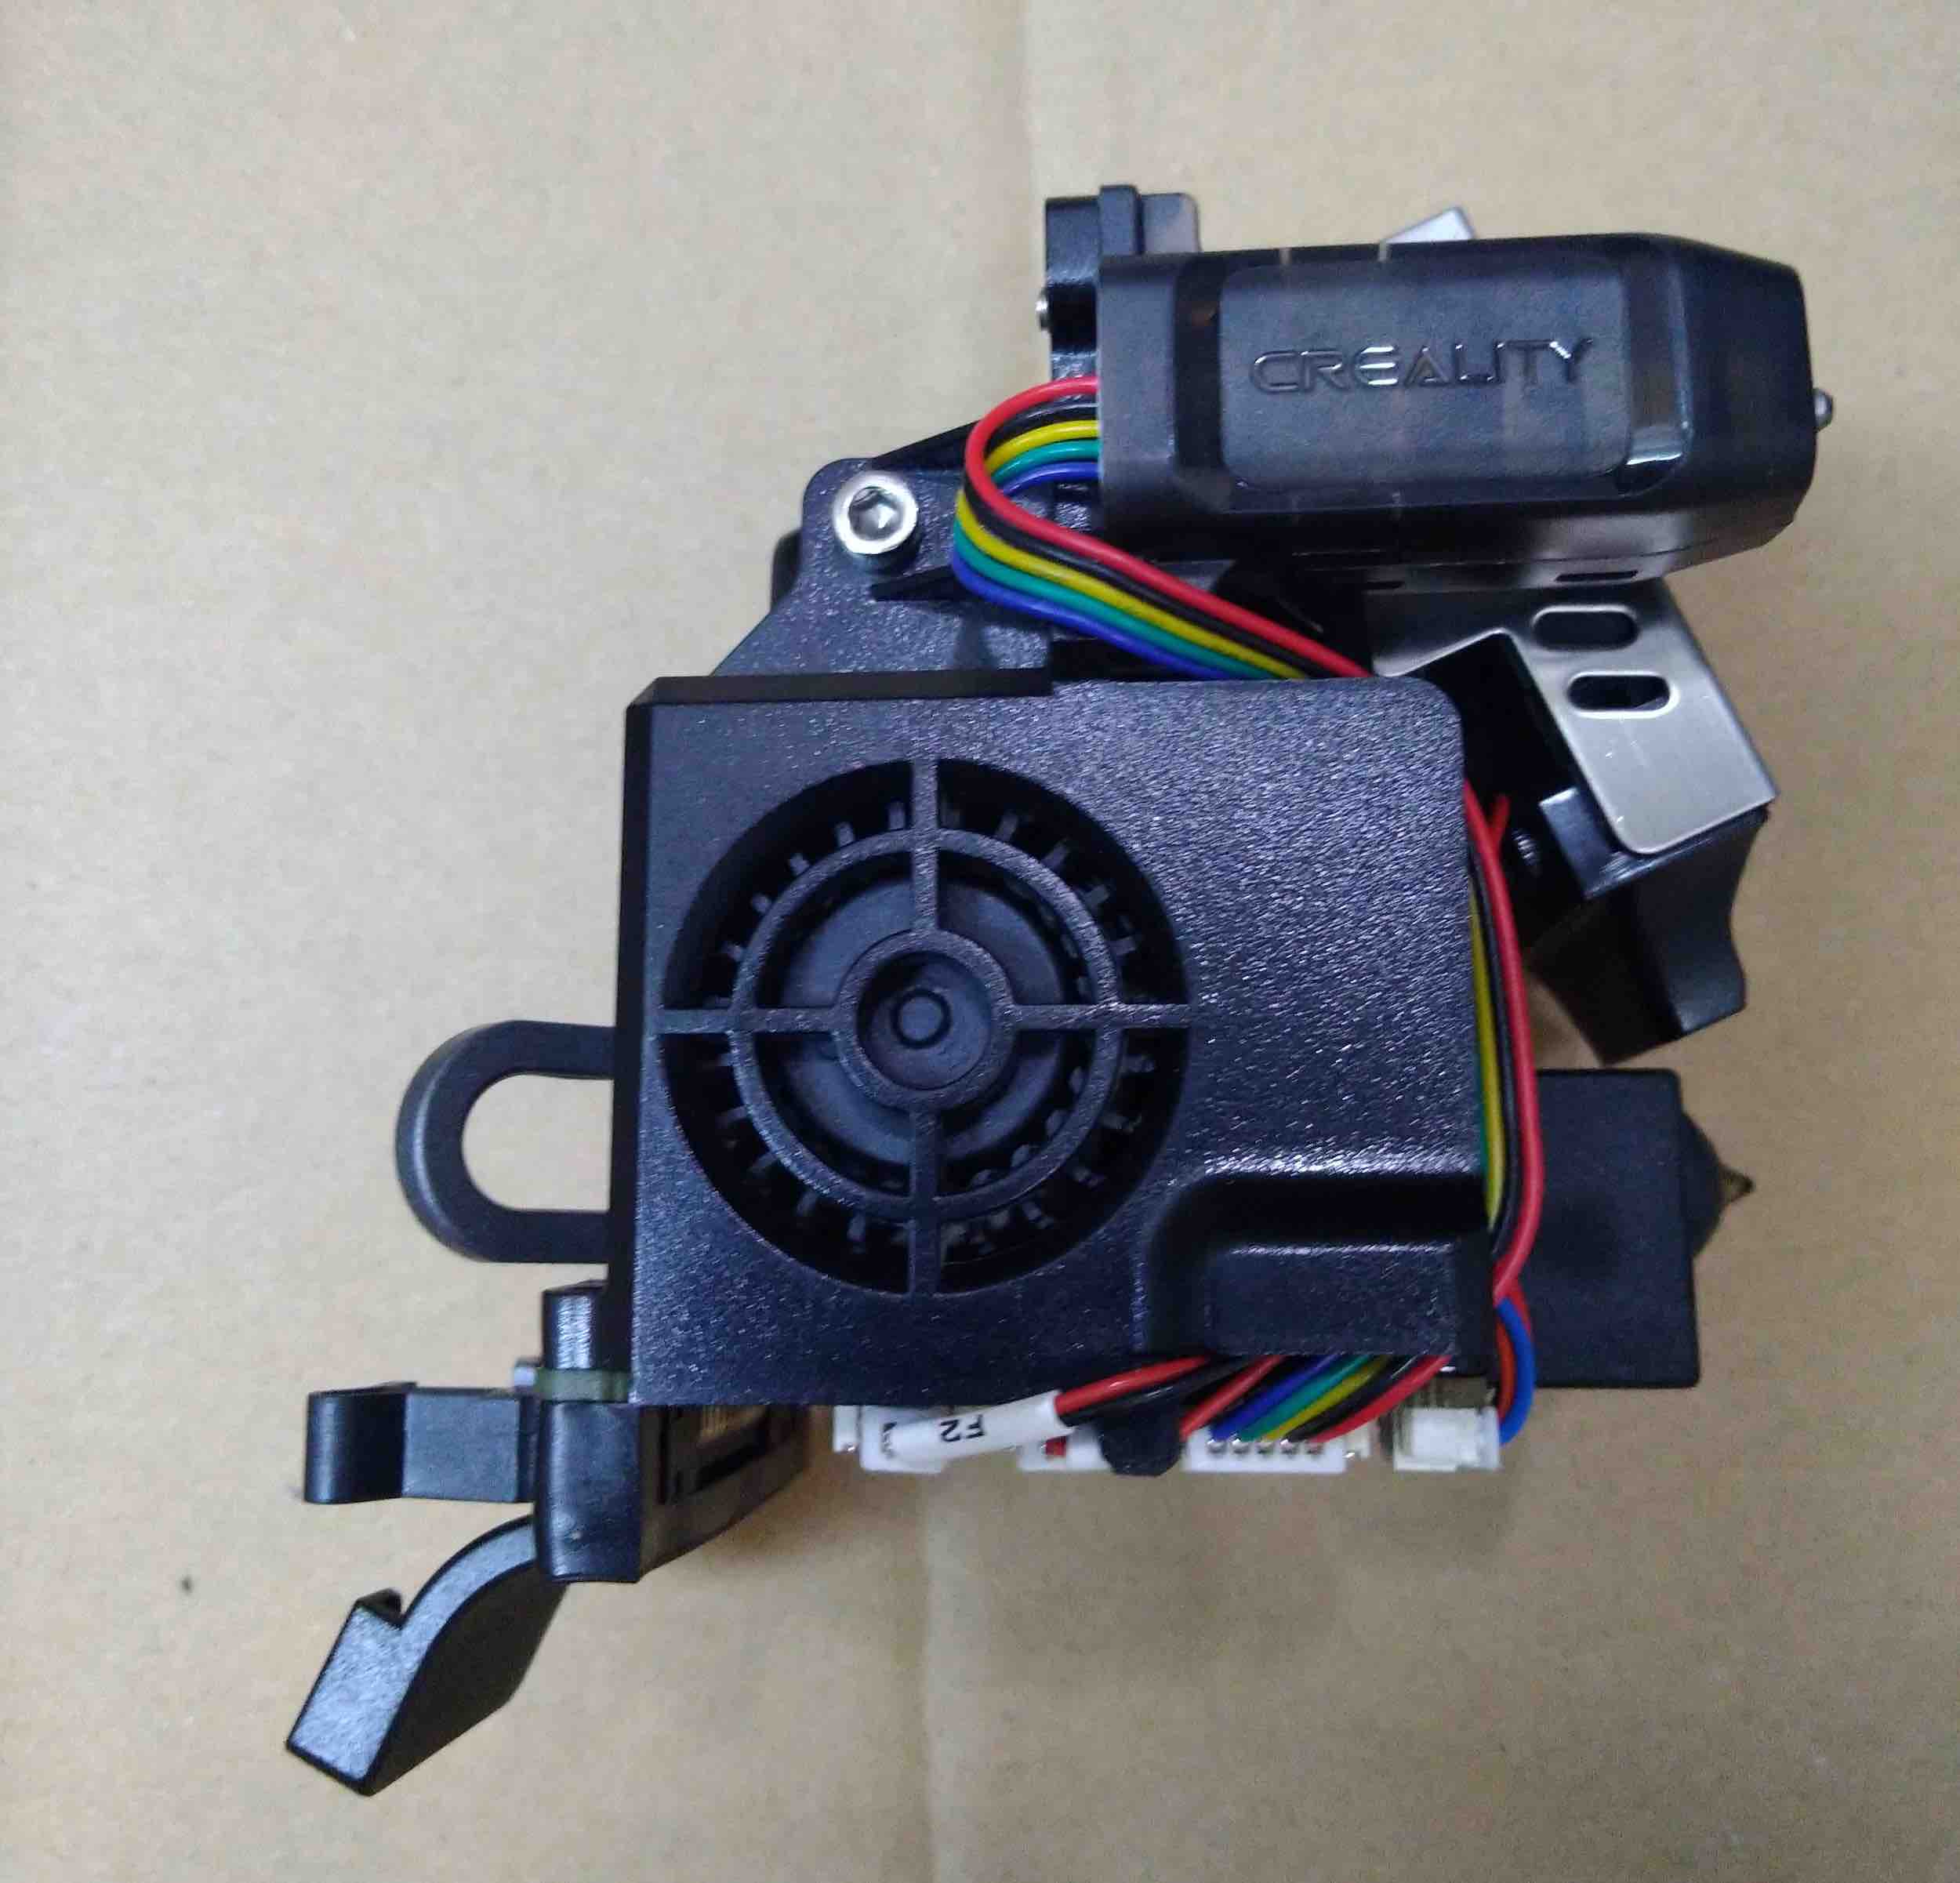
The printer employs the Creality’s new “Sprite” full-metal dual-gear direct extruder, which has an extrusion force of 80N. This ensures smooth material feeding when printing with a wider range of filaments, including flexible filaments.
It has a 0.4 mm nozzle and a maximum temperature of 300 °C, allowing you to print with a variety of materials.
Bed Levelling
Creality’s S1 Pro printer includes both bed knobs and a 16-point CR Touch for automatic levelling, which can be useful if the automatic levelling isn’t producing satisfactory results.
However, in our case we faced a few niggles while getting the auto-bed levelling to work properly. But it was a not a major issue (which we are explaining below) and we even charted down a simple process for you to follow in case you too face a similar issue.
So, the problem we faced was that as we assembled the printer we directly tried out the auto-bed levelling feature, completed the process and initiated a print. But to our horror, the nozzle touched the print bed and was scratching the surface. Obviously, the levelling was not good. On trying again we faced the same issue.
So, as a solution we went to the basics and tried a manual bed levelling method. The screen UI has option for conducting a manual bed levelling and we used that to level the bed. We then followed it up with the auto-bed levelling but again the nozzle scratched the print bed. The solution for this type of an error is most probably an erroneous Z-offset value. So, we tinkered a bit with the adjust the Z-offset value and after some trial and error, we found the value ‘-1.85’ which worked perfectly well for us.
So, we recommend you to follow the same process: First manually level the bed, then follow it up with auto-bed levelling and then playing with the Z-offset value to finally find the appropriate value that prints well.
LED Light

This is a special feature included with the S1 Pro. You have to purchase the light separately in case you want this for other S1 series printers. The LED light bar is located at the very top mounted on a lightweight plastic and comes preinstalled. It has a power switch on the side to turn the light on and off.
The LED is a 24V/5W light that is bright enough to give you god visibility. It enables you to place the printer even in darker corners of your workshop or garage and still carry out printing operations efficiently. You can even print at night with this light.
Connectivity
The printer can be connected using either a USB-C cable or an SD card. The USB-C connection is fast and dependable, and the SD card allows you to print without having to keep your computer connected to the printer.
Filament Sensor and Print Recovery

The filament sensor is one of the Creality Ender-3 S1 Pro’s standout features. The sensor detects when the filament is running low and automatically pauses the printing process until the filament is replaced by the user. This feature is especially useful for large print jobs where the user may not be present to continuously monitor the printer.
Additionally, the Ender-3 S1 Pro has a print recovery feature that saves your print progress in case of a power outage or other interruptions. This feature safeguards your work by allowing you to resume printing from where you left off.
Materials
The Creality Ender-3 S1 Pro is a versatile printer because as it is compatible with a wide range of materials. The printer supports the basic materials like PLA, ABS, PETG, flexible, as well as industrial materials like Carbon Fiber, Nylon, and ASA, making it ideal for users who require a printer that can handle a variety of projects. The printer has a direct extrusion system and thus allowing efficient use of flexible and composite materials. It has a single nozzle with a diameter of 0.4 mm, which delivers high-quality prints.
Software
The USB drive that comes with the printer contains the installation file for the Creality Slicer along with an installation guide showing the steps to use the software. If you wish, you can use this software. We are well versed with Ultimaker Cura so we used Cura.
In Cura, we couldn’t find the profile for the Ender-3 S1 Pro when we tested it, but because the printer’s bed size is the same as the Ender-3 S1, for which a profile is available, we used the S1 profile and it worked perfectly well. No issues whatsoever.
In addition to Cura, you can use other slicers such as PrusaSlicer, Simplify3D, or any other that you prefer.
3D Prints on Ender-3 S1 Pro


Price

Coming to the most awaited question about the printer, Price. With the Ender series of printers, Creality has made sure these printers are quite affordable and the Ender-3 S1 Pro makes no exception. The printer is priced at $479. It is definitely one of the high priced printer sin the line-up but in comparison the Ender-3 S1 Plus is priced higher at $529.
Given the features it offers, the price is still quite reasonable. The printer’s cost is competitive with other printers in its class, and its features make it an excellent value for money.
While some have argued that if most of the features are similar to the Ender-3 S1, then why buy the latest S1 Pro, it is not a completely sound argument. To help you understand why you are paying an extra $100 for the S1 Pro, let us see the below table
Comparison with Ender-3 S1
| Specifications | Ender-3 S1 | Ender-3 S1 Pro |
| Build Volume | 220 x 220 x 270 mm | 220 x 220 x 270 mm |
| Extruder | Sprite” full-metal dual-gear direct | Sprite” full-metal dual-gear direct |
| Cost | $379 | $479 |
| Bed Levelling | CR Touch probe for bed levelling | CR Touch probe for bed levelling |
| LED Light | No. Buy Separately | Pre-installed with the printer – Better than S1 |
| Build Plate | Polycarbonate (PC) | PEI spring steel magnetic plate – Better than S1 |
| Nozzle Temperature | 260 °C | 300 °C – Better than S1 |
| Material Compatibility | PLA, ABS, TPU, PETG | PLA, ABS, TPU, PETG, PA, Nylon, Carbon Fiber, ASA – Better than S1 |
Well, for half of the users the choice may be simple, which is to go for the lower priced printer, but for Pro users and those who like to print with a variety of materials, you will be well off with the Ender-3 S1 Pro. For one, the S1 Pro has a higher nozzle temperature enabling you to print with more materials and even with PA, Nylon, Carbon Fiber. To ensure they are printed well, the bed temperature is slightly increased and even the build plate is better in S1 Pro. All these additions to the S1 Pro make it costlier but also quite desirable for power users.
Creality Ender-3 S1 Pro Review: Bottom Line
The major upgrade on the S1 Pro comes in the form of a wider material compatibility. A set of features are added in this version to ensure the added materials are reliably printer. So, the bottom line is fairly clear from our point of view. The printer is perfect for:
- Power users who want to print with materials like Nylon and Carbon fibre.
- If you only want to print with the basic filaments, and you already have an S1, then upgrading to the new S1 Pro may not make much sense to you.
- However, if you are not an S1 user, then probably buying the S1 Pro would be a better decision for you.
Rating
Rating the Creality Ender-3 S1 Pro FDM 3D Printer


