If you have used a 3D printer even for one day, I’m sure you would have already encountered an STL file. An STL file in 3D printing is as ubiquitous as PDF files in document sharing. It is the standard way to prepare and share 3D models for printing. STL (Stereolithography or Standard Tessellation Language) files store your 3D designs as a collection of triangles that slicing software can interpret and convert into printer instructions.
Despite being developed in 1987, STL remains the most widely used format in 3D printing today due to its simplicity and universal compatibility. While newer formats offer additional features, understanding STL files is essential for anyone serious about 3D printing.
In this comprehensive guide, I want to unravel what STL files are, how they work, their strengths and limitations, and how to handle them effectively in your 3D printing projects. While STL files are foundational to 3D printing, understanding their constraints will help you determine when to use them and when to consider alternatives.
What is an STL File in 3D Printing? Definition & Origin
STL stands for Stereolithography, named after the first commercial 3D printing technology developed by 3D Systems. Some also refer to it as “Standard Tessellation Language,” though this is a retroactive interpretation rather than its original meaning.
At its core, an STL file is simply a way of representing 3D models as collections of triangular facets (triangular mesh). This triangulation method breaks down even the most complex 3D shapes into simple geometric elements that 3D printers can understand and process.
How Does an STL File Work? Inside the File Structure
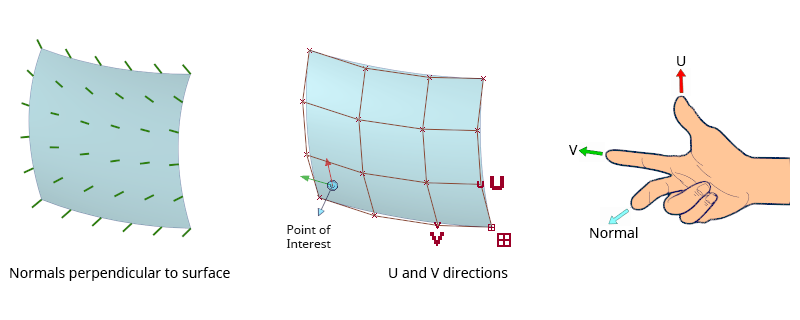
An STL file represents a 3D model’s surface geometry using a mesh of triangles, often called facets. Each triangle is defined by:
- Vertices: The three corner points of each triangle
- Normals: A vector indicating which side of the triangle is the outside of the model
ASCII vs Binary STL formats
STL files come in two formats: ASCII and Binary.
ASCII STL files are human-readable text files that look something like this:
solid name
facet normal 0.0 0.0 1.0
outer loop
vertex 0.0 0.0 0.0
vertex 1.0 0.0 0.0
vertex 0.0 1.0 0.0
endloop
endfacet
endsolid name
Binary STL files contain the same information but in a more compact, computer-friendly format. While not human-readable, binary STL files are significantly smaller (often 5-6 times smaller) and process more quickly.
I’ve found that binary STL files are almost always the better choice for 3D printing. When working with complex models, the file size difference becomes substantial—a 20MB ASCII file might be just 3-4MB in binary format, which makes transferring and processing much faster.
When your slicing software receives an STL file, it interprets this mesh of triangles and translates it into printer instructions (G-code). The software cuts the model into horizontal layers and calculates the tool paths the printer will follow to build your object layer by layer.
Why is the STL File Format Popular in 3D Printing?
The STL format has maintained its dominance in 3D printing for several compelling reasons:
Universal compatibility: Nearly every 3D design software can export STL files, and every slicer can import them. This universal support makes STL the common language of 3D printing.
Simplicity: The straightforward structure of STL files makes them easy for software to process and validate.
Lightweight processing: The simple triangle mesh requires minimal computational resources to handle, even for complex models.
Broad adoption: STL has become the de facto standard for FDM, DLP, SLA, and even SLS 3D printing workflows, creating a network effect that reinforces its position.
Beginner-friendly: For newcomers to 3D printing, working with a single, widely-supported format simplifies the learning curve.
Limitations of STL Files You Should Know
Despite its popularity, the STL format has significant limitations you should be aware of:
No colour or texture information: STL files store only geometric data, with no support for colour, texture, or material properties. This means you’ll need to set material characteristics in your slicer software.
Triangle-only representation: STL can only use triangles to represent surfaces, making it inefficient for curved surfaces which require many small triangles to appear smooth.
No embedded units or scale: STL files don’t contain information about the intended physical size of the model. When importing an STL, you may need to manually scale it to the correct dimensions.
Large file sizes for detailed models: High-resolution models with many triangles can result in very large STL files, making them cumbersome to share and process.
No structural information: STL files lack data about the internal structure of objects, which limits their usefulness for advanced applications like multi-material printing.
STL vs Other 3D Printing File Formats: A Quick Comparison
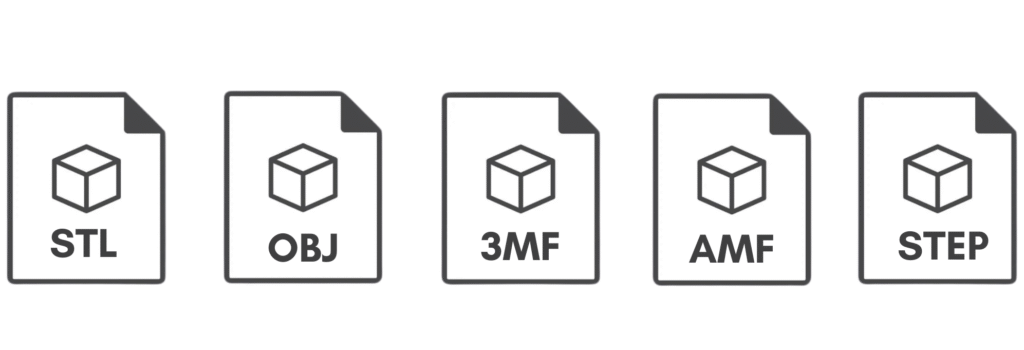
STL vs OBJ
OBJ files support multi-colour and texture mapping, making them superior for visual applications. However, for standard single-material 3D printing, STL remains more efficient and widely supported.
STL vs 3MF
3MF (3D Manufacturing Format) is a newer, more comprehensive format that addresses many STL limitations. It supports colours, materials, lattice structures, and has more efficient file compression. Despite these advantages, 3MF hasn’t yet displaced STL in terms of widespread adoption.
STL vs AMF
AMF (Additive Manufacturing File Format) was developed specifically to overcome STL’s limitations. It supports colours, materials, curved triangles, and internal structures. However, AMF hasn’t gained the industry traction initially expected.
STL vs STEP
STEP files represent the opposite end of the spectrum from STL. While STL simplifies geometry into triangles, STEP files preserve precise mathematical surfaces, curves, and parametric information. STEP files are primarily used in professional CAD environments for design exchange and aren’t directly compatible with most 3D printing slicers. However, they’re invaluable when you need to modify a design before converting to STL for printing.
Comparison Table
| Feature | STL | OBJ | 3MF | AMF | STEP |
| Geometry | Triangles only | Triangles, quads, polygons | Triangles with efficiency improvements | Triangles, curved triangles | Precise surfaces, curves |
| Colour support | No | Yes | Yes | Yes | No |
| Texture support | No | Yes | Yes | Yes | No |
| Material data | No | Limited | Yes | Yes | Limited |
| Internal structures | No | No | Yes | Yes | Yes |
| Parametric data | No | No | No | No | Yes |
| File size efficiency | Poor | Moderate | Good | Good | Very poor |
| Industry adoption | Excellent | Good | Growing | Limited | Excellent (CAD) |
| Direct 3D printing | Yes | Yes | Yes | Yes | Limited* |
*STEP files can now be directly imported into PrusaSlicer 2.5+ and Bambu Studio, but most other slicers still require conversion to STL first.
In my experience working with various file formats, I still find myself using STL files for about 90% of my projects. While formats like 3MF offer clear technical advantages, the universal support for STL makes workflow issues much less common, especially when collaborating with others using different software tools.
How to Create and Export an STL File
Most 3D design software can export STL files, though the process varies slightly between applications. Here’s how to export from popular design tools:
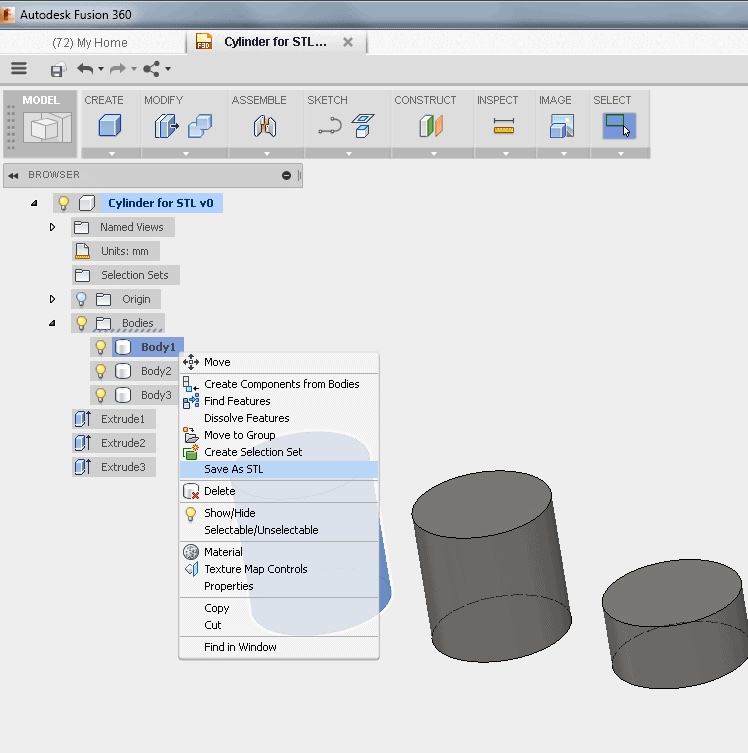
Fusion 360
- Right-click on the body or component in the browser panel
- Select “Save as STL”
- In the dialog box, adjust mesh refinement settings
- Choose binary format for smaller file size
- Select file location and click “OK”
SolidWorks
- Click “File” > “Save As”
- Select “STL (*.stl)” from the file type dropdown
- Click “Options” to adjust resolution settings
- Choose binary format
- Click “Save”
Blender / TinkerCAD
Blender:
- Select your model
- Click “File” > “Export” > “STL (.stl)”
- Configure export settings in the side panel
- Click “Export STL”
TinkerCAD:
- Select your design
- Click “Export” in the top right
- Select “STL” from the dropdown
- Choose refinement level
- Click “Download”
When exporting, you’ll often need to choose resolution settings. Higher resolution means more triangles and smoother curves, but larger file sizes. I typically use medium resolution for most prints, as it provides a good balance between quality and file size. I’ve found that ultra-high resolution settings rarely improve print quality noticeably, but they can dramatically increase slicing time and may even cause issues with some slicers.
Once, I tried using an online CAD-to-STL conversion tool for a model I designed in another format, thinking it would be quicker. The result was a low-resolution STL file with visibly faceted curves that didn’t slice well at all. That experience taught me the hard way that exporting directly from your modelling software is essential. These days, nearly every 3D design tool offers a native STL export option—and it’s definitely the way to go for clean, printable models.
Using STL File in 3D Printing Workflow
Once you have an STL file, you’ll need to process it through a slicer program that converts the 3D model into printer instructions.
Importing into slicers:
- Open your slicer software (Cura, PrusaSlicer, Lychee, etc.)
- Use the import or open function to select your STL file
- Verify the model appears at the correct size
- Position the model on the build plate
- Configure print settings (layer height, infill, supports, etc.)
- Slice the model to generate G-code
- Save the G-code file to your printer’s memory card or send directly to your printer
Sometimes STL files may contain errors that need repair. I will not go into details of each of these tools in this article so just listing them down. The below tools can help:
Meshmixer: It is excellent for identifying and fixing non-manifold geometry and other mesh issues.
Netfabb: It has powerful automated repair features with a simple and straightforward interface.
MakePrintable: This is a cloud-based service that can fix even severely damaged STL files.
For optimal results when working with STL files:
- Check for manifold errors before printing
- Use the appropriate resolution for your needs
- Orient models to minimise support structures
- Consider splitting large models into printable sections
Common Issues with STL Files (and How to Fix Them)

Non-manifold Geometry
Non-manifold geometry refers to impossible physical structures, such as infinitely thin walls or edges connecting more than two faces. These issues can confuse slicers and lead to failed prints.
Fix: Use tools like Meshmixer or Netfabb to identify, fix non-manifold edges and vertices and repair stl files.
Holes, Inverted Normals, Flipped Triangles
STL files sometimes contain holes in the mesh or triangles facing the wrong direction, causing slicing errors.
Fix for holes: Automatic repair functions in Meshmixer or Netfabb can typically seal holes.
Fix for normals: Most slicers and repair tools have “unify normals” or “fix orientation” functions.
Recommended STL Repair Workflow
When dealing with problematic STL files, I follow this workflow:
- Import the STL into a repair tool like Meshmixer
- Run an analysis to identify issues
- Apply automatic repairs for common problems
- Manually fix any remaining issues
- Export the repaired model
- Test the repaired file in your slicer
One trick I’ve found particularly useful is using the “Make Solid” function in Meshmixer for severely damaged models. This essentially rebuilds the entire mesh surface, which can solve multiple issues at once. The downside is that it may lose some fine details, but it’s often a lifesaver for otherwise unprintable models.
Real-World Example: STL in Action
To illustrate the STL workflow, let’s follow a student project creating a phone stand:
- Design Phase: The student designs a simple phone stand in Fusion 360, focusing on creating a stable base and the correct angle for viewing.
- Export to STL: After completing the design, they export it as a binary STL file, selecting medium resolution for adequate detail without excessive file size.
- Slicing Phase: The student imports the STL file into Cura, sets the print parameters (0.2mm layer height, 20% infill, no supports needed due to design), and slices the model.
- Printing Phase: The G-code is loaded onto an Ender 3 printer, and the print begins.
- Challenges Encountered: The student notices that the first print has some inconsistencies in the walls. Loading the STL back into Fusion 360, they discover the original design had some very thin features that didn’t translate well to the STL format.
- Solution: They thicken the problematic areas in the original design, re-export the STL, and slice again. The second print comes out perfectly.
This real-world example highlights how the STL format serves as the crucial link between design and physical object, while also demonstrating some of its limitations with very fine features.
Why Understanding STL Files Matters
Understanding STL files is fundamental to successful 3D printing. As you’ve learned, this simple yet powerful format serves as the backbone of the 3D printing process, translating your digital designs into printer-ready models.
While STL has clear limitations—particularly its lack of colour, texture, and material information—its simplicity and universal support make it the go-to format for most 3D printing applications. For standard single-material prints, STL files remain the most practical choice.
That said, as your 3D printing skills advance, you may want to explore newer formats like 3MF and AMF for more complex projects, especially those involving multiple materials or colours. These formats address many of STL’s limitations and may eventually become the new standard.
By mastering STL files—how to create them, optimise them, and fix common issues—you’ve gained essential knowledge that will serve you well in all your 3D printing endeavours.
FAQs
-
What is the difference between STL and 3MF?
STL files store only geometric data (triangular meshes), while 3MF can include colour, material properties, internal structures, and other metadata. 3MF also provides more efficient file compression and better preserves design intent.
-
Are STL files editable?
STL files are technically editable, but not easily so. They contain only mesh data without the original design parameters or features. For significant edits, it’s better to modify the original CAD file and re-export as STL. For minor mesh repairs, tools like Meshmixer or Blender can be used. That is the reason why most service providers ask for a STEP file.
-
Why is my STL file not printing correctly?
Common reasons include non-manifold geometry, holes in the mesh, inverted normals, or problems with scale. Try running the file through repair software like Netfabb or Meshmixer before printing. Also, check that your slicer settings are appropriate for the model’s complexity.
-
What’s the best software for STL repair?
For basic repairs, Meshmixer (free) is excellent and user-friendly. Netfabb (both free basic and paid professional versions) offers powerful automated repair functions. For severe issues, online services like MakePrintable can handle models too damaged for other tools.
-
Can I find any free CAD models to 3D print?
Yes, there are many 3D printing repositories from where you can download Free STL files for 3D printing. If you wish to just 3D print those parts for personal use then it is completely free but in case you intend to modify and/or sell those designs then I’ll advise you to check the usage licence and what is allowed by the owner of the CAD model.
About Manufactur3D Magazine: Manufactur3D is an online magazine on 3D printing. which publishes the latest 3D printing news, insights and analysis from all around the world. Visit our 3D Printing Education page to read more such informative articles. To stay up-to-date about the latest happenings in the 3D printing world, follow us on Facebook, LinkedIn and Twitter.